lavadip / android
4 Posts filed under "android" category
Sat Jun 26 2021
Accuracy of SkEye Cam
Update 1, 5th July 2021: A few days after publishing this post, I changed the solver to assume a square pixel grid. This helps converge the solution faster though it changes the results slightly. This post has been updated with the newer results.
Update 2, 14th July 2021: Better accuracy after correcting for lens distortions.
I have created a new app called SkEye Cam. It’s a Camera App targeted at hobbyist astronomers (such as myself), and its highlight feature at launch will be real-time plate-solving.
Plate-solving is the act of figuring out which part of the sky has been captured on a camera plate (image). This can not only help identify objects in the image, it can also help find the orientation of a telescope, which in turn can be used for navigation, etc.
Compared to raw IMU sensors, plate-solving has the promise of being more accurate and reliable. But exactly how accurate can it be?
We decided to find out.
Method & Apparatus
- A camera pointed to the sky on a sturdy mount, and locked in position (no tracking). This ensures that only the Earth’s rotation will change the camera field over time, and this change can be precisely computed.
- Capture multiple images with timestamps, with a gap of about one minute.
- From the timestamp, calculate elapsed time for each image w.r.t the first image’s timestamp.
- From the elapsed time, calculate expected changes in RA, Declination, and frame rotation angle.
- Determine the difference between plate-solved values w.r.t the expected values of RA, Dec, rotation angle.
Data collection
Being clouded out myself, I sought the help of my friend, Brewster LaMacchia. He has been photographing the night sky with his phone for some time now. You can view his astro-photos on his local astronomy club’s page here.
Brewster has a Pixel 3a which has a FOV of 65° by 50°. He also has an add-on telephoto lens (Sirui 60mm), which can be placed atop the phone’s camera to yield a narrower FOV of 40° by 30°.
He collected four sets of images from the combinations of the following criteria:
- Camera pointed at Declination 90 (near Polaris), and pointed at Declination 0 (near Virgo)
- With and without the telephoto lens
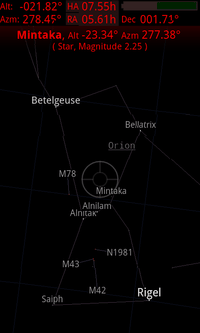
Here’s a sample from each data set:
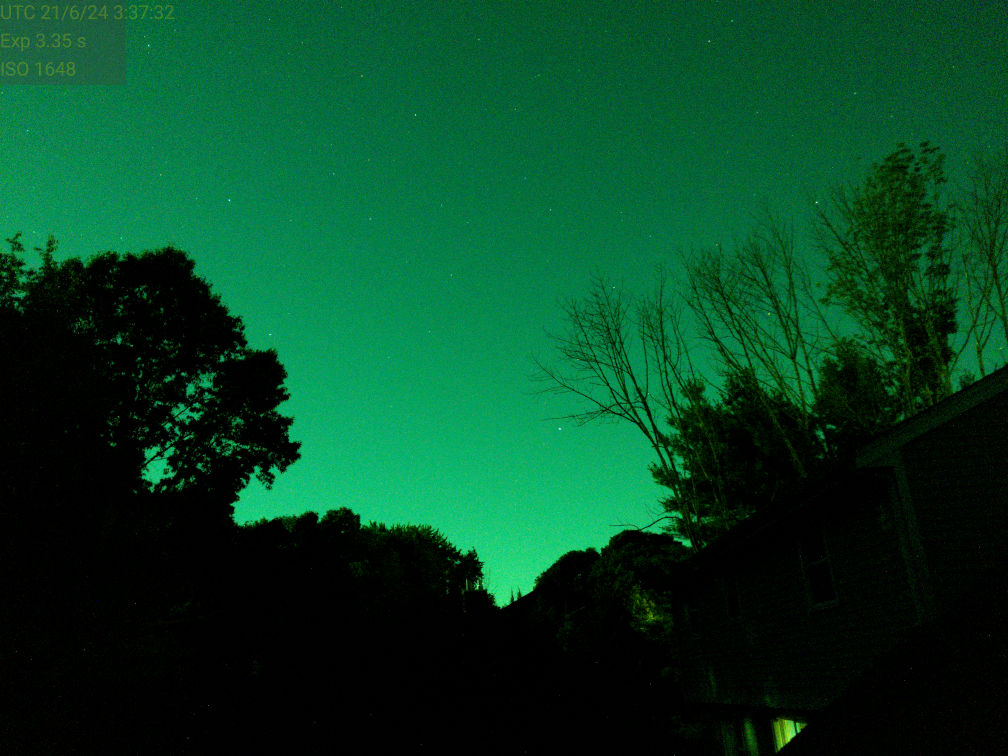
Native camera Dec 0°

Native camera Dec 90°
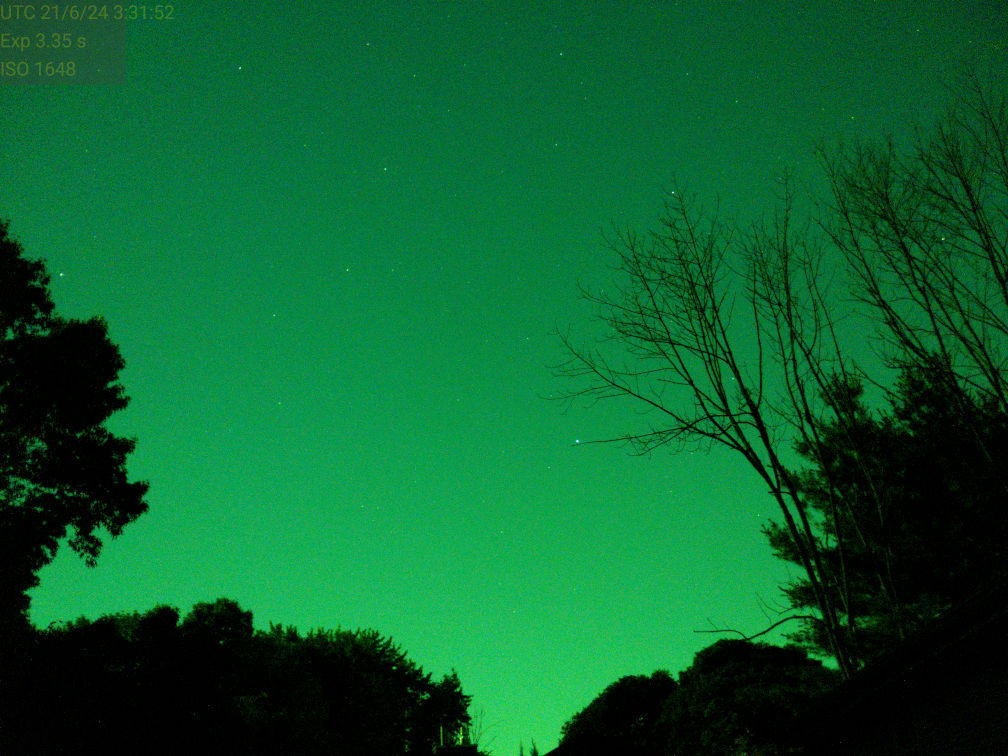
60mm lens Dec 0°

60mm lens Dec 90°
The images appear greenish because color correction hasn’t been implemented yet.
Note that major parts of the images are covered by trees/houses, and all of them were captured on 23 June, in the presence of a near full moon.
I tested the plate-solver on these images offline, with a script running on my laptop.
The plate-solver estimates the lens distortion and this can be stored as part of the calibration and used in a later solve to correct the image. It happens automatically within the app, but for this experiment, I setup the script to estimate the lens distortion on the first image in each set, and then used it to for the remaining images in that set.
Here are the results:
Native lens
The FOV of the native camera is about 65° x 50° (typical of most smartphone cameras).
Declination 0°
| Without Lens Correction | With Lens Correction | |
| Max RA Error | 1.8' | 1.5' |
| Max Dec Error | 3.5' | 1.8' |
Declination 90°
| Without Lens Correction | With Lens Correction | |
| Max Rotation Angle Error | 0.35' | 0.18' |
| Max Dec Error | 1' | 0.44' |
The worst error with the native camera was under 5 arc-minutes. And under 2 arc-minutes after lens correction!
With the add-on lens (Sirui 60mm)
The effective FOV with the add-on lens is about 40° x 30°.
Declination 0°
| Without Lens Correction | With Lens Correction | |
| Max RA Error | 1' | 0.73' |
| Max Dec Error | 2.8' | 0.52' |
Declination 90°
| Without Lens Correction | With Lens Correction | |
| Max Rotation Angle Error | 9.9' | 0.47' |
| Max Dec Error | 1.1' | 0.84' |
The worst error with the add-on lens was about 10’ which is worse than the native lens. However, after correcting for lens distortion, the worst error is less than 1 arc-minute!
Conclusion
It looks like the accuracy obtained from plate-solving on a typical smartphone camera is sufficient for hobbyist purposes. With the caveat that this is a single test run using a relatively good camera, on a relatively clear night. More testing with other devices and sky conditions is required.
If you would like to test the app yourself, you can download it from this link.
Sun Apr 17 2011
SkEye now has an API
This post might interest you if you are an Android app developer. I have created an API for SkEye that other applications can use.
There are three functions that are supported by this API:
- searching for any object present in SkEye’s database,
- viewing a position specified by RA / Dec,
- details about the position and object viewed in SkEye at the time of quitting
All these APIs use the power of Android’s Intent feature to exchange data with SkEye.
The Search function
This can be invoked with the ACTION_SEARCH type of Intent with the target object specified by a path, similar to a website URL. The format used for the path is:
astro_object//category/object_nameHere are a few examples,
astro_object//solarsys/saturn | Identifies Saturn in the Solar system catalog |
astro_object//star/Aldebaran | Identifies a star. |
astro_object//messier/m31 | Identifies M31 in the Messier Catalog |
astro_object//constellation/bootes | Identifies the constellation Bootes |
You can also let SkEye search all its catalogs by specifying “any” as the category. It is pretty simple when you look at the code. Here is an example in which we searh for the planet Jupiter,
public void clickJupiterSkEyeSearch(View v) {
  safeLaunchSkEye("astro_object//solarsys/jupiter");
}

// The following two helper functions will help launch SkEye safely
private void safeLaunchSkEye(String objPath) {
  final Intent skEyeIntent = new Intent(Intent.ACTION_SEARCH);
  final Uri targetUri = new Uri.Builder().path(objPath).build();
  skEyeIntent.setDataAndType(targetUri, "text/astro_object");

  safeLaunchActivity(skEyeIntent, "SkEye v1.2 or higher");
}

private void safeLaunchActivity (Intent i, String hint) {
  if (i.resolveActivity(getPackageManager())!= null) {
    startActivity(i);
  } else {
    Toast.makeText(this, "Please install "+hint, Toast.LENGTH_SHORT).show();
  }
}
The View function
This can be invoked with the ACTION_VIEW type of Intent with the target position specified by extra data in the Intent. The following extra data needs to be present:
RA (double) | Right Ascension (J2000 epoch / ICRS) in radians |
Declination (double) | Declination (J2000 epoch / ICRS) in radians |
Here’s some sample code,
public void clickViewRADec(final View v) {
  safeLaunchSkEyeForViewing(6, 30); // View position 6 hours, 30 degrees
}

private void safeLaunchSkEyeForViewing(final double raHours, final double decDegrees) {
  final Intent skEyeIntent = new Intent(Intent.ACTION_VIEW);
  skEyeIntent.setType("text/astro_position");
  skEyeIntent.putExtra("RA", Math.toRadians(ra*15));
  skEyeIntent.putExtra("Declination", Math.toRadians(dec));
  final Uri targetUri = new Uri.Builder().scheme("skeye").build();
  skEyeIntent.setDataAndType(targetUri, "text/astro_position");

  safeLaunchActivity(skEyeIntent, "SkEye v5.4 or higher", ACTIVITY_REQUEST_VIEW);
}
Returned data
When SkEye quits it will return the last position that was being viewed. To get this data you will need to launch SkEye with the startActivityForResult function. The Intent that is returned has the following extra data:
RA | (double) | Right Ascension (J2000 epoch / ICRS) in radians |
Declination | (double) | Declination (J2000 epoch / ICRS) in radians |
centeredObjPresent | (boolean) | If true, then the following data is also present. |
centeredObjName | (String) | Name of the object nearest to the center. |
centeredObjRa | (double) | RA of centered object in radians. |
centeredObjDec | (double) | Declination of centered object in radians. |
Sample project
A sample Gradle + Java project with complete source code is available here.
Open API
While designing the API I have tried to keep it open, so that there are no SkEye specific dependencies. The Intent uses the mimetype to find an activity that can handle it. Other planetarium apps are welcome to implement to this API by handling this mimetype. I will be happy to receive feedback and evolve the API further.
Applications using this API
Star Odyssey is a guide book of the brightest stars.
Star Log lets you locate logged objects.
Meteor Shower Calendar can point the origin of a meteor shower.
Sat Feb 26 2011
SkEye : Ideas for phone mounts
I get a lot of reports of people using SkEye with their telescopes. Here, I am collecting all the different ways that phones have been mounted with the telescope body (OTA) so that you could derive your own ideas from them.
A/C vent mount adapted for Binocular use
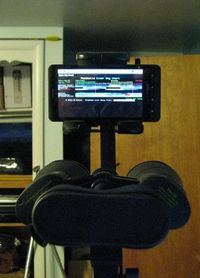
A CloudyNights member, WaterMaster, hacked out a nice design for attaching his phone on his binocular mount.
In the linked page you will find a lot of detailed images of his setup, but you need to be signed in to see the images.
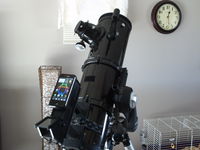
Suction mount
Another CloudyNights member, Thirsty, said this on the forums:
This is how I use SkEye on my SCT. I used a Magellan GPS suction mount and fitted the standard Droid vehicle mount to it. The Droid mount suction cup does not hold as well. It has stayed on the OTA for weeks like this.
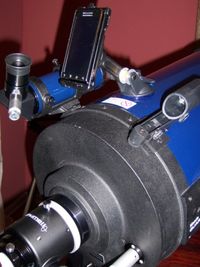
Handle-bar mount on a 16” LightBridge
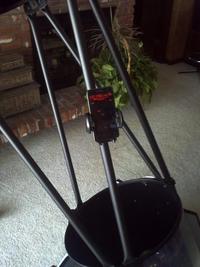
Yet another CloudyNights member, Steven Plant (Project Galileo), has been modding his 16” LightBridge with various hacks. Here is his post about the “phone mod”
The tubes of the LightBridge are Steel and cause magnetic interference. But the truss poles are Aluminium which don’t cause any interference; hence they are the best place to attach the phone. There are many tips and pictures of the mod so please check out the full post.
Mounted on Telrad riser
I have seen quite a few people attaching the phone on their Telrads. IMO, this is not a good idea. The batteries and circuits in the Telrad may cause interference. In the very least you should switch off the Telrad while using SkEye (if the phone is attached near to the Telrad).
Doug had attached his phone as shown in the image, directly to the Telrad. (Enlarged view). He had better results after taking out the Telrad and attaching the phone on the Telrad Riser
Windshield mount
The video also demos an app called Calibrator (that works only on rooted devices). This app can add a hue/tint to the entire phone display. It is very handy to add a red tint for preserving dark eye adaptation.
Thermocol mount
Update: Wooden bracket attached to finderscope dovetail
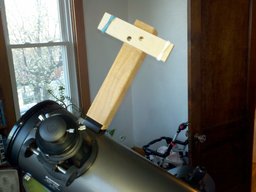
Carl fashioned out a bracket using two wooden pieces. Two rubber bands clamp the phone to the bracket. See photos and description here.
Update: Silicon case tied to OTA with a flattened tyre tube
Marco in the comments posted an easy solution that I think will work very well.
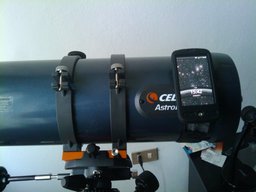
My hack: Phone jacket + Velcro
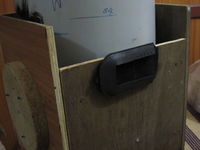
I stitched a Velcro strip to the back of an old phone jacket. The complementary Velcro strip was nailed to a wooden plank on the OTA. The phone can be slotted in quickly when required.
Note: As of 2025, I no longer use the above setup. I instead have a 1/8” hole in the OTA in which I screw-in a phone holder that has a 1/8” thread. The phone holder can be twisted to face the observer when using with SkEye app, or twisted to point in the same direction as the telescope when using SkEye Cam.
Add your own…
If you have come up with an idea for mounting the phone, please share it via the comments or email/tweet me. I want to keep this list updated whenever I find a new idea.
Tue Dec 28 2010
Introducing SkEye
SkEye is a Planetarium for Android. It is similar to Google Sky Map, but designed to work with telescopes. It lets you use your phone as a PUSHTO guide without needing any other equipment.
There is now a dedicated website for SkEye and related apps.
